10 Steps to Building a Residential Pole Barn Home
December 07, 2021
There was a time when people would scratch their heads, wondering why anyone would want to live in, well, what they considered a machine shed. Those days are long gone as residential pole barn homes are soaring in popularity across the country. With complete design flexibility resulting in a 100 percent customizable look, greater durability and energy efficiency than traditionally built houses, there’s a lot to love about pole barn home living.
Here are 10 steps that will take any mystery out of building a pole barn house. (Note – The construction process is fluid and some of these steps can happen simultaneously.)
Start by sketching out a floor plan that you find appealing. Consider the number and size of bedrooms and bathrooms you want, as well as the size other living spaces like dens, hobby rooms, kitchen, etc.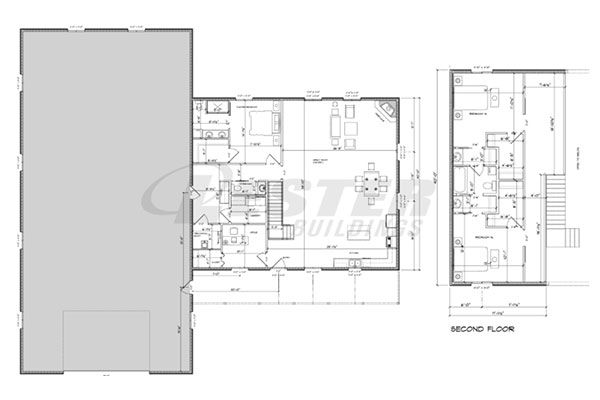
Our Redwood Residential floor plan (2,780 sqft)
And don’t forget about storage, advises Sheldon Schulte of Schulte Construction, who’s been building residential pole barn homes for 10 years. “Two things that customers often don’t factor into their floorplans are enough closets and the size of the garage. You want large closets – and a lot of them – and a large garage because you can never have enough storage space.”
It's important to think about how you want one room to flow into another and where you’d like to have windows and doors. If you’re not sure where to start, look for inspiration in magazines and on websites. Pinterest is rich with ideas and is easy to use. You could also start with design ideas using our residential floor plans or photo gallery.
Don’t worry about how professional your floor plan looks. “Honest to goodness, most of my custom home projects start with sketches on a cocktail napkin or a Sharpie on graph paper,” Schulte says.
Because not all builders are alike, evaluating which is right for you can be a daunting task. Be sure to ask:
For a complete step-by-step guide on how to choose the right partner, download our free Evaluating Your Building Supplier guide.
For a deeper look into financing, check out these five tips for a smooth experience.
For example, your property might not be close to a lake or river, but it could be zoned as lying within a floodplain. Development might still be allowed with just a land use permit and a building permit, but restrictions could apply. If you don’t have the time, knowledge, or confidence to work directly with government agencies that grant permits, be sure to select a builder who will work in partnership with you, or one that will pull all necessary permits on your behalf. Your builder should be able to supply you with the proper construction plans to get the right permits.
Others construct only the shell – the exterior walls, doors, windows, and roof. If you select a builder like this, you’ll need to also hire a team of tradesmen including excavators, concrete layers, plumbers, electricians, insulation installers and drywall hangers. To coordinate these professionals, you also might want to hire a general contractor or be prepared to handle it yourself.
“The first thing I want is to look at is the property,” Schulte says. “I want to see what the elevations look like to figure out how much excavation work we have to do or if we have to build up the land anywhere.” (Note: some builders may want to see your property before providing a quote.)
In most cases, the construction of pole barn houses takes less time than conventionally built homes – depending on the size and complexity of the design, about three to six months. However, it does depend on your location and the time of year. Winter in colder regions could add several weeks to the process if construction crews need to shut down because of severe cold or snow.
Another factor impacting all construction projects today is the COVID-19 pandemic. “Supply chains are broken worldwide, making it a challenge sometimes to maintain schedules,” Kormanik and Schulte both agree. Patience is a virtue for anyone planning to build in this day and age!
“Whatever you can imagine, I can build into a pole barn home,” Schulte adds.
Of course, you’ll have decided on all the major design criteria, like the shape of the exterior and the interior floor plan, at the beginning of your building project. But once the structure is up, a pole barn house can be furnished just like any other home. If you lean toward sleek, modern interior design options, that’s great! If you prefer a French country look or American western theme, go for it! Like the looks of a log cabin or traditional farmhouse? Why not!
If you’re ready to build your dream pole barn home, contact your local Lester dealer or representative today.
Here are 10 steps that will take any mystery out of building a pole barn house. (Note – The construction process is fluid and some of these steps can happen simultaneously.)
Step One: Come up with a design
Generally, the cost of your dream pole barn home is driven by square footage; it’s important to first figure out design criteria so that you can establish a budget and get financing.Start by sketching out a floor plan that you find appealing. Consider the number and size of bedrooms and bathrooms you want, as well as the size other living spaces like dens, hobby rooms, kitchen, etc.

Our Redwood Residential floor plan (2,780 sqft)
And don’t forget about storage, advises Sheldon Schulte of Schulte Construction, who’s been building residential pole barn homes for 10 years. “Two things that customers often don’t factor into their floorplans are enough closets and the size of the garage. You want large closets – and a lot of them – and a large garage because you can never have enough storage space.”
It's important to think about how you want one room to flow into another and where you’d like to have windows and doors. If you’re not sure where to start, look for inspiration in magazines and on websites. Pinterest is rich with ideas and is easy to use. You could also start with design ideas using our residential floor plans or photo gallery.
Don’t worry about how professional your floor plan looks. “Honest to goodness, most of my custom home projects start with sketches on a cocktail napkin or a Sharpie on graph paper,” Schulte says.
Step Two: Buy land
If you don’t already own a piece of property to build on, it’s time to buy one for several reasons:- The condition of the property is a big factor determining the final cost of your building project. If it’s located in a remote area without access to established infrastructure (water, sewer, electricity, gas, even roads), you’ll have to figure in costs to build access to those essential services. Land that needs more excavation will be pricier to build on than land that’s in construction-ready shape. “Getting a property into functional shape can add a third to the price of a project,” advises Ben Kormanik of K Construction, who has been building pole barn homes for more than a quarter century.
- Some builders consider whether a customer already has land to build on as a qualifying factor for doing business together.
- Some local governing bodies (townships, cities, counties, states) will require more or different building permits than others. The more permits needed, the more costly the overall project becomes.
- The site you select can dictate the layout of your building and floorplan.

Step Three: Find a builder
A good builder will help you create a floorplan and develop a budget, as long as you have an idea of what you want your layout to look like. (Yes, scratches on a napkin are a good place to start.)Because not all builders are alike, evaluating which is right for you can be a daunting task. Be sure to ask:
- about their experience building pole barn homes
- what their warranties cover
- whether the quote they provide is a complete proposal or only an estimate that’s subject to change
- what kind of flexibility there is in designing your home
- for references, with their contact information
For a complete step-by-step guide on how to choose the right partner, download our free Evaluating Your Building Supplier guide.
Step Four: Secure financing (This step should be done in conjunction with step Three)
Pole barn houses are escalating in popularity, but they aren’t yet as common as conventionally built homes, so finding the right lender is key. Financial institutions that don’t understand the post frame building process could be unwilling to risk financing something they’re unfamiliar with. However, if you have the right information and approach the right lender, securing financing should be no different than getting a mortgage for a traditionally built house.For a deeper look into financing, check out these five tips for a smooth experience.
Step Five: Get the right building permits
Before putting a shovel in the ground, you must get the right permits. As we noted earlier, the number and type of permits you’ll need varies widely depending on location. “We serve five counties with four or five municipalities of size, and they all have different requirements,” Kormanik explains. “It’s been our experience that you want to get the permitting people involved at the cost estimate stage so that any weird zoning issues are identified up front.”For example, your property might not be close to a lake or river, but it could be zoned as lying within a floodplain. Development might still be allowed with just a land use permit and a building permit, but restrictions could apply. If you don’t have the time, knowledge, or confidence to work directly with government agencies that grant permits, be sure to select a builder who will work in partnership with you, or one that will pull all necessary permits on your behalf. Your builder should be able to supply you with the proper construction plans to get the right permits.
Step Six – Gather your construction team
Some pole barn home builders are turnkey, providing comprehensive construction services.Others construct only the shell – the exterior walls, doors, windows, and roof. If you select a builder like this, you’ll need to also hire a team of tradesmen including excavators, concrete layers, plumbers, electricians, insulation installers and drywall hangers. To coordinate these professionals, you also might want to hire a general contractor or be prepared to handle it yourself.
Step Seven – Site preparation
Once you’ve firmed up your plans, secured a mortgage and signed a contract with the right builder, the construction process is ready to begin! The first step here is site preparation.“The first thing I want is to look at is the property,” Schulte says. “I want to see what the elevations look like to figure out how much excavation work we have to do or if we have to build up the land anywhere.” (Note: some builders may want to see your property before providing a quote.)
Step Eight – Construction
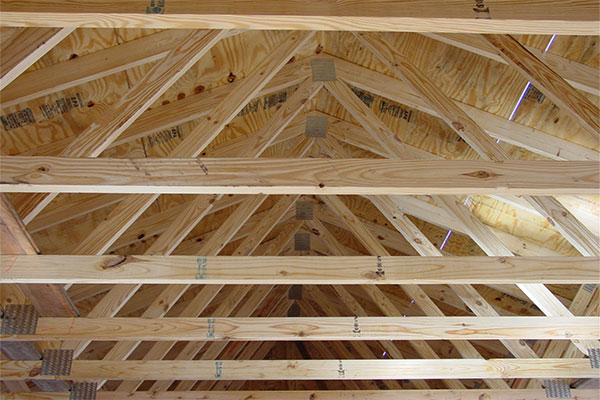
When the building site is functional, you’ll see your home start to materialize. Foundation framing and/or support poles are put in place. Then the concrete slab is poured. Exterior wall framing is then attached to the support poles. The roof and exterior siding come next, followed by interior walls.
In most cases, the construction of pole barn houses takes less time than conventionally built homes – depending on the size and complexity of the design, about three to six months. However, it does depend on your location and the time of year. Winter in colder regions could add several weeks to the process if construction crews need to shut down because of severe cold or snow.
Another factor impacting all construction projects today is the COVID-19 pandemic. “Supply chains are broken worldwide, making it a challenge sometimes to maintain schedules,” Kormanik and Schulte both agree. Patience is a virtue for anyone planning to build in this day and age!
Step Nine – Finishing touches
One of the most appealing aspects of pole barn homes is design flexibility. “Because post frame homes have all the load bearing walls on the perimeter, you have complete flexibility inside,” Kormanik says.“Whatever you can imagine, I can build into a pole barn home,” Schulte adds.
Of course, you’ll have decided on all the major design criteria, like the shape of the exterior and the interior floor plan, at the beginning of your building project. But once the structure is up, a pole barn house can be furnished just like any other home. If you lean toward sleek, modern interior design options, that’s great! If you prefer a French country look or American western theme, go for it! Like the looks of a log cabin or traditional farmhouse? Why not!

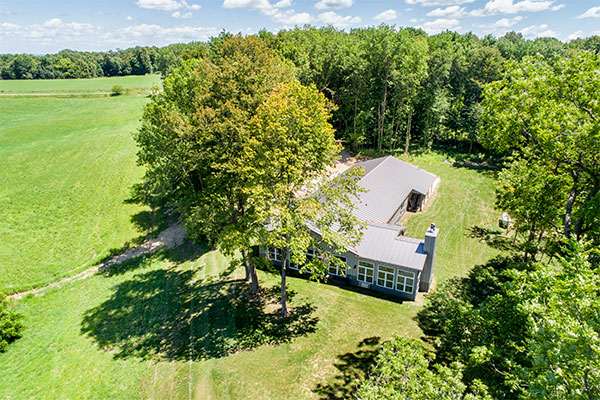
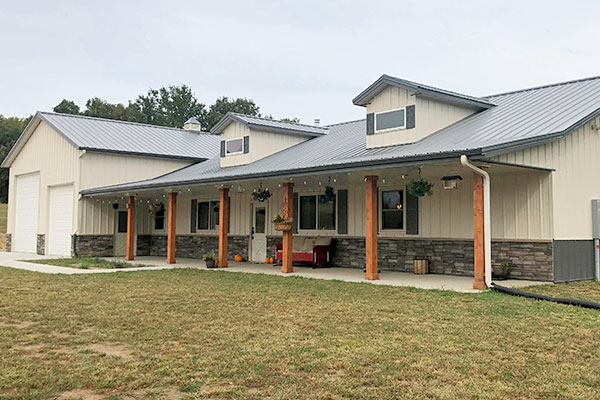
An existing residential Lester Building with an Eclipse Roof (Project #613505)

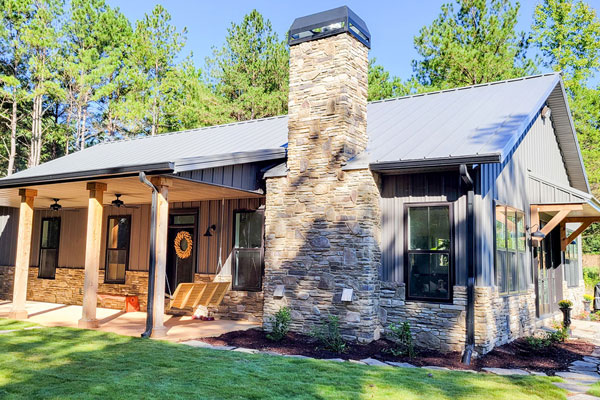
An existing residential home with stone wainscot. (Project #614611)
Step Ten – Move in and enjoy your dream pole barn home!
Residential pole barn homes offer so many benefits, from energy efficiency and design flexibility to maintenance free exteriors and durability. (Did you know that Lester Building’s pole barn homes come with a lifetime structural warranty?) It’s hard to imagine why someone wouldn’t want to live in one!If you’re ready to build your dream pole barn home, contact your local Lester dealer or representative today.
